Making my notes in one place about what I've got in the yard for dyeplants in 2010.
For dyeplants, I've got Northern Bedstraw (Galium boreale) in place of Madder for reds; it will not have nearly as strong of a color but it's native to this area. So is alumroot (Heuchera americana), so I've got that planted, if I get a chance to experiment I'd like to see what kind of colorfastness I can get from its roots. Although I imagine the amount of alum in any given year has a lot to do with soil composition and growing conditions, so I'll still use store-bought alum for anything I want to know is mordanted properly. Sunflowers are also native to the area, and I was able to get some Hopi Dye Sunflower seeds; it will be interesting to see what color I can get from them. We have a wonderful red mulberry tree (Morus rubra) in the yard, but my attempts at getting good berry color last year resulted in nothing but an ugly pinkish gray - obviously I made some mistakes...
Non-native plants I added include Dyer's Coreopsis (some Coreopsis species are native to the area, but not that one). Although I got the seeds from Park Seeds, a large company, so I don't know if they'll even be the right species. I also have daylilies (they've naturalized in the neighborhood); I got an absolutely beautiful clear yellow from their spent flowers last year. We have a delicious rhubarb (much better than anything we get from the store) that's been in our yard since before we bought the house, but it's so good I hate to dig up its roots for dye! The patch in the front yard probably does need to be divided this year anyway, though.
I'm starting onion seeds (I hope, I didn't order them yet!) but they're a biennial, so I won't have my own home-grown onion peels until the end of summer 2011... so they don't really count.
I know I've got a few more that I'm forgetting; guess I'll have to come append to this post later on! Doesn't do much good to have my list in one spot if it's not complete yet...
Friday, February 19, 2010
Sunday, February 14, 2010
Planted Celeriac
Wasn't intending to try celeriac this year (although it was on my list of things to try someday in the future), but Sand Hill Preservation Center sent me a trial of Monstorpolgi seeds with my order.
According to the University of Minnesota extension, I should have planted the seeds back on February 1, but I'm going ahead with them today (two weeks later) to see if they'll work. Even planting 6 squares (5 seeds each) didn't make a noticeable dent in the pile of tiny seeds in the packet, so I'll still have plenty to try in future years.
Since I'm not sure I'll be starting anything else (even broccoli) for another three weeks, I decided not to get the lights, etc. set up yet. My heat pad hasn't even arrived in the mail from Southern Exposure, so I couldn't set that up if I wanted to! Instead, I just stuck the seeds in 6 sections of a paper egg carton, set that on a plastic disposable plate, and put it on my desk near the window. If Xander doesn't knock the whole thing on the floor in the next few weeks, I'll move it down with the rest of the seedlings once I get them started.
So I launch into this overly-ambitious gardening year with a brand-new type of vegetable that I've never eaten, or seen, or even heard of until I read the Seed to Seed guide over this past winter! Probably a fitting summary of my gardening plans for this year...
Saturday, October 17, 2009
Dye - Black Walnut Husks
Finally, a foolproof dyestuff that really was proof against me!
Collected about a dozen walnuts from the neighbor's yard (our young black walnut didn't like this spring's weather and dropped all its nuts on the ground before the end of June). Husked them and laid out most of the bits to dry, but saved one walnut's worth (93g fresh) and dropped the bits in ~1 gallon of water (which turned dark yellow instantly).
24 hours later, added 1/2 c white vinegar (recommended in J.N. Liles' book).
48 hours after dyepot started, simmered 1 hour and strained. Added 6g buff-colored wool (previously dyed with either mulberry or buckthorn) and 6g alum-mordanted undyed wool to the warm dyebath.
72 hours after adding wool, removed and rinsed it. Can't tell which wool was predyed, but both bits have a very noticeable green tinge!
Added 25g more of the predyed wool, tied in various places with sock yarn, to see if I could get patterns of light/dark dye. Simmered for 2 hours, left to soak 24 more hours, then rinsed and set out to dry. Looks like there are definitely dark/light spots, but it looks more like the dyestuff had settled to the bottom of the pot; the parts touching the bottom are very dark brown, while parts floating just below the surface are light. Guess that teaches me a lesson about remembering to stir the pot once I'm done simmering, not just let it sit there untouched for 24 hours!
Still no pictures, haven't worked out where to host my photos now that Flickr's complaining about reaching 200...
Dye - Curly Dock Leaves
Spent part of the weekend weeding, so while I was at it, I pulled all the curly dock roots and leaves into a pile to see what I could do with dye. I knew that sorrel root was supposed to give an orangey color, so it seemed worth grabbing its relative, curly dock (since I don't have any sorrel growing wild in the yard!)
I laid out the roots on newspaper in the garage to dye, since I knew I wouldn't get to them for a while. I chopped up the leaves into a 164-gram pile, added to 8 cups of sink water, and simmered for 60 minutes (never quite boiled). The water was still very pale, so I left the dyestuff to cool in the pot.
8 days later I got back to the dyepot, which had fermented (didn't smell nearly as nice anymore!) Added 3g of wool, 1/2 alum-mordanted but undyed, and 1/2 previously-died wool (buckthorn? mulberry? not sure which) that was a pale buff color.
Left to soak for 2 days at about 67 degrees, then turned the heat on to a simmer after adding more water (about 3/4 had evaporated). After simmering one hour, let the dyepot cool until the next night, then rinsed and dried the wool. Got a muddy yellow color.
(No pictures this post; Flickr tells me I'm at my limit for free photo hosting. Need to figure out where to move that won't impose a 200-picture limit...)
Dye - Mulberries
This one seemed like a sure win; mulberries stain our family's hands and feet for half the summer each year, and the stain takes days to wear off the skin.
I gathered about 2 cups of mulberries and soaked them in water to ferment for 3 weeks (took me a while to get back to them...) I did not add vinegar (we were out).

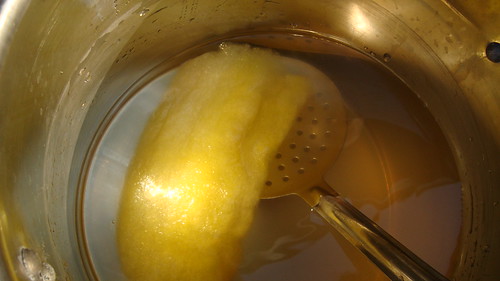
After three weeks, I strained the quite fermented mixture and added it to a 1:4 vinegar:water dyepot, then added 129g alum-mordanted wool (from Smoky Mountain Fibers, like all my other wool samples so far) and slowly raised the temperature.

The dye extract was certainly a beautiful color, and my first peek at the wool looked really good!
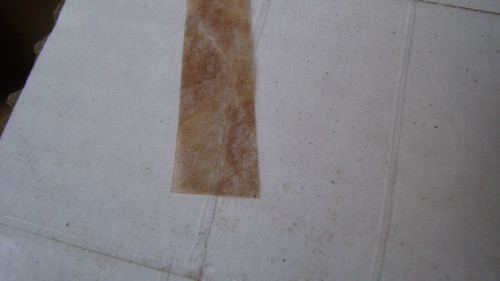
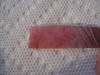
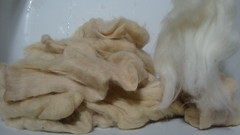
After simmering for 1 hour, I removed the wool and dried thoroughly. My notes say I should have dried it without rinsing, then rinsed the wool several days later... but I think I forgot that step and rinsed it well. I also may have overheated the dyepot, I think it started boiling at one point. I read that if the pH goes above 7 it can produce a grayish color instead of pink, so maybe that contributed to the color, although I did add vinegar to the dyepot.

What a miserable color! The worst yet, and out of the dyestuff I'd had the highest hopes for... of course, if I was going to felt this and make miniature toys or something it would probably be perfect for some skin tones.
I gathered about 2 cups of mulberries and soaked them in water to ferment for 3 weeks (took me a while to get back to them...) I did not add vinegar (we were out).
After three weeks, I strained the quite fermented mixture and added it to a 1:4 vinegar:water dyepot, then added 129g alum-mordanted wool (from Smoky Mountain Fibers, like all my other wool samples so far) and slowly raised the temperature.
The dye extract was certainly a beautiful color, and my first peek at the wool looked really good!
After simmering for 1 hour, I removed the wool and dried thoroughly. My notes say I should have dried it without rinsing, then rinsed the wool several days later... but I think I forgot that step and rinsed it well. I also may have overheated the dyepot, I think it started boiling at one point. I read that if the pH goes above 7 it can produce a grayish color instead of pink, so maybe that contributed to the color, although I did add vinegar to the dyepot.
What a miserable color! The worst yet, and out of the dyestuff I'd had the highest hopes for... of course, if I was going to felt this and make miniature toys or something it would probably be perfect for some skin tones.
Wednesday, July 8, 2009
Fourth dye attempt - daylily flowers
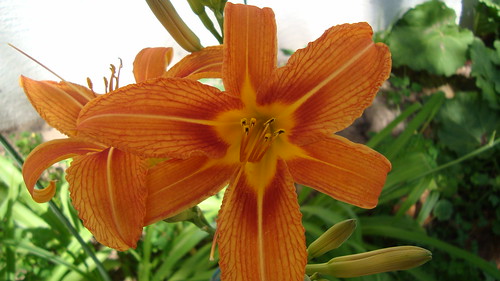
Well, after a failed attempt at dying wool with our mulberries (which I thought would be foolproof, how can you FAIL to get a good color from mulberries?!?), I picked some (17) spent daylily flowers while walking around the yard and decided to see what I could get from them.
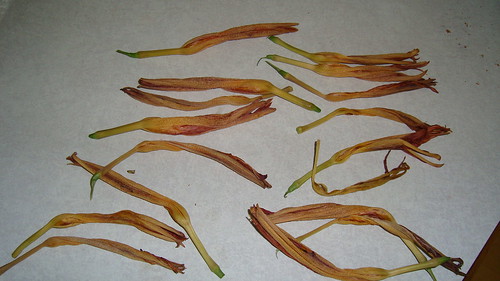
After soaking and them simmering them for 30 minutes, the dyebath color didn't look promising, but I figured I'd drop in a bit of wool and dye it anyway, to see what happened.
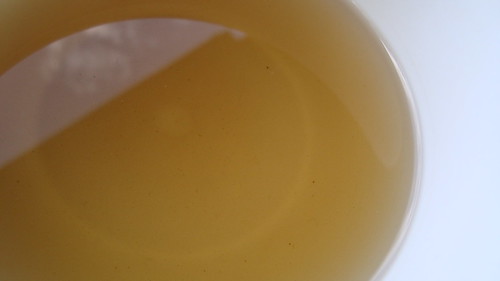
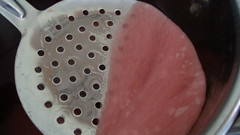
The dyebath pH was as close to neutral as my red cabbage strips can measure:
I added 5 grams of merino wool (pre-mordanted with alum/cream of tartar) and simmered for an hour. When I went back to check on it, there was a faint trace of a yellow-brown color, but it was hard to tell whether it was even on the wool. I didn't even bother to take a picture.
My weekend ended, and I headed back to work the next morning. Didn't get around to taking the wool out. Another day passed, and late in the evening I finally remembered to take that ugly wool out of the dyepot so I could start another plant... and wow, something changed!!
I thought it would be a trick, like with my berry dyes, and all the color would wash right out, but the rinse water stayed completely clear - as far as I can tell, none of the color rinsed out at all, even with dishsoap!

Finally, a color I'd be happy to reproduce. Next time I'll have to weigh the daylily flowers; I completely forgot to do that. And maybe I'll even try mulberries again before the season is over. They dye everyone's feet dark purple, how can I fail? But first I think I'll try walnut leaves, that should be even harder to mess up...
Friday, May 15, 2009
Second dye attempt - buckthorn berries
I know that buckthorn berries from another species of buckthorn were used to make a yellow wool dye in past centuries, so I decided to see what I could do with the buckthorn berries from our local park, after they'd fermented on the trees all winter.
I collected them while everything was still frozen and stored them in the freezer until I was ready to use them (a few weeks).
Following the general tips in Rita Buchanan's book, I put the berries into a gallon ziploc bag and smashed it gently with a rubber mallet to break up the skins. Then I put the berries in an empty cottage cheese container with just enough water/vinegar mixture to cover them (4 parts water to 1 part vinegar). I left the container on the kitchen counter for a week - I was worried there would be a strong fermented smell, but it never got bad, certainly not as strong as when we're fermenting to make beer or wine!
After one week, I tested the pH using my red cabbage strips; it was definitely in the acidic range, but I can't easily get more specific than that:
Then, it was time to dye! I heated the dyebath to a simmer and added my wool. I let it simmer for about an hour, then left the dyepot to cool for the day. The dyebath wasn't a color that would make my list of favorites, but at least it showed some promise:

Unfortunately, when I pulled the wool out and rinsed it, all I got was a very pale, muddy yellow brown. I'll try overdying it with dandelions or garlic mustard something and see what I can do with it... guess buckthorn berries (Rhamnus cathartica species) aren't going on my list of favorite local dyestuffs! Would have been nice to use that invasive pest for something...
I collected them while everything was still frozen and stored them in the freezer until I was ready to use them (a few weeks).
Following the general tips in Rita Buchanan's book, I put the berries into a gallon ziploc bag and smashed it gently with a rubber mallet to break up the skins. Then I put the berries in an empty cottage cheese container with just enough water/vinegar mixture to cover them (4 parts water to 1 part vinegar). I left the container on the kitchen counter for a week - I was worried there would be a strong fermented smell, but it never got bad, certainly not as strong as when we're fermenting to make beer or wine!
After one week, I tested the pH using my red cabbage strips; it was definitely in the acidic range, but I can't easily get more specific than that:
Then, it was time to dye! I heated the dyebath to a simmer and added my wool. I let it simmer for about an hour, then left the dyepot to cool for the day. The dyebath wasn't a color that would make my list of favorites, but at least it showed some promise:
Unfortunately, when I pulled the wool out and rinsed it, all I got was a very pale, muddy yellow brown. I'll try overdying it with dandelions or garlic mustard something and see what I can do with it... guess buckthorn berries (Rhamnus cathartica species) aren't going on my list of favorite local dyestuffs! Would have been nice to use that invasive pest for something...
Subscribe to:
Posts (Atom)