Finally, a foolproof dyestuff that really was proof against me!
Collected about a dozen walnuts from the neighbor's yard (our young black walnut didn't like this spring's weather and dropped all its nuts on the ground before the end of June). Husked them and laid out most of the bits to dry, but saved one walnut's worth (93g fresh) and dropped the bits in ~1 gallon of water (which turned dark yellow instantly).
24 hours later, added 1/2 c white vinegar (recommended in J.N. Liles' book).
48 hours after dyepot started, simmered 1 hour and strained. Added 6g buff-colored wool (previously dyed with either mulberry or buckthorn) and 6g alum-mordanted undyed wool to the warm dyebath.
72 hours after adding wool, removed and rinsed it. Can't tell which wool was predyed, but both bits have a very noticeable green tinge!
Added 25g more of the predyed wool, tied in various places with sock yarn, to see if I could get patterns of light/dark dye. Simmered for 2 hours, left to soak 24 more hours, then rinsed and set out to dry. Looks like there are definitely dark/light spots, but it looks more like the dyestuff had settled to the bottom of the pot; the parts touching the bottom are very dark brown, while parts floating just below the surface are light. Guess that teaches me a lesson about remembering to stir the pot once I'm done simmering, not just let it sit there untouched for 24 hours!
Still no pictures, haven't worked out where to host my photos now that Flickr's complaining about reaching 200...
Saturday, October 17, 2009
Dye - Curly Dock Leaves
Spent part of the weekend weeding, so while I was at it, I pulled all the curly dock roots and leaves into a pile to see what I could do with dye. I knew that sorrel root was supposed to give an orangey color, so it seemed worth grabbing its relative, curly dock (since I don't have any sorrel growing wild in the yard!)
I laid out the roots on newspaper in the garage to dye, since I knew I wouldn't get to them for a while. I chopped up the leaves into a 164-gram pile, added to 8 cups of sink water, and simmered for 60 minutes (never quite boiled). The water was still very pale, so I left the dyestuff to cool in the pot.
8 days later I got back to the dyepot, which had fermented (didn't smell nearly as nice anymore!) Added 3g of wool, 1/2 alum-mordanted but undyed, and 1/2 previously-died wool (buckthorn? mulberry? not sure which) that was a pale buff color.
Left to soak for 2 days at about 67 degrees, then turned the heat on to a simmer after adding more water (about 3/4 had evaporated). After simmering one hour, let the dyepot cool until the next night, then rinsed and dried the wool. Got a muddy yellow color.
(No pictures this post; Flickr tells me I'm at my limit for free photo hosting. Need to figure out where to move that won't impose a 200-picture limit...)
Dye - Mulberries
This one seemed like a sure win; mulberries stain our family's hands and feet for half the summer each year, and the stain takes days to wear off the skin.
I gathered about 2 cups of mulberries and soaked them in water to ferment for 3 weeks (took me a while to get back to them...) I did not add vinegar (we were out).

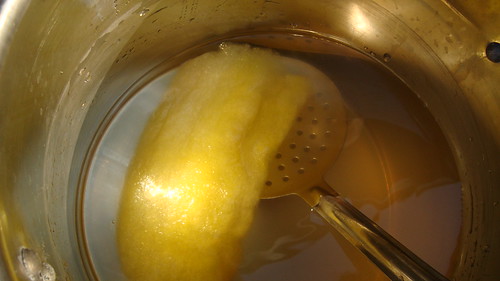
After three weeks, I strained the quite fermented mixture and added it to a 1:4 vinegar:water dyepot, then added 129g alum-mordanted wool (from Smoky Mountain Fibers, like all my other wool samples so far) and slowly raised the temperature.

The dye extract was certainly a beautiful color, and my first peek at the wool looked really good!
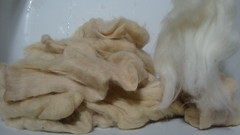
After simmering for 1 hour, I removed the wool and dried thoroughly. My notes say I should have dried it without rinsing, then rinsed the wool several days later... but I think I forgot that step and rinsed it well. I also may have overheated the dyepot, I think it started boiling at one point. I read that if the pH goes above 7 it can produce a grayish color instead of pink, so maybe that contributed to the color, although I did add vinegar to the dyepot.

What a miserable color! The worst yet, and out of the dyestuff I'd had the highest hopes for... of course, if I was going to felt this and make miniature toys or something it would probably be perfect for some skin tones.
I gathered about 2 cups of mulberries and soaked them in water to ferment for 3 weeks (took me a while to get back to them...) I did not add vinegar (we were out).
After three weeks, I strained the quite fermented mixture and added it to a 1:4 vinegar:water dyepot, then added 129g alum-mordanted wool (from Smoky Mountain Fibers, like all my other wool samples so far) and slowly raised the temperature.
The dye extract was certainly a beautiful color, and my first peek at the wool looked really good!
After simmering for 1 hour, I removed the wool and dried thoroughly. My notes say I should have dried it without rinsing, then rinsed the wool several days later... but I think I forgot that step and rinsed it well. I also may have overheated the dyepot, I think it started boiling at one point. I read that if the pH goes above 7 it can produce a grayish color instead of pink, so maybe that contributed to the color, although I did add vinegar to the dyepot.
What a miserable color! The worst yet, and out of the dyestuff I'd had the highest hopes for... of course, if I was going to felt this and make miniature toys or something it would probably be perfect for some skin tones.
Wednesday, July 8, 2009
Fourth dye attempt - daylily flowers
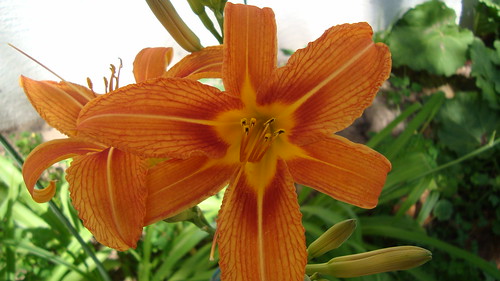
Well, after a failed attempt at dying wool with our mulberries (which I thought would be foolproof, how can you FAIL to get a good color from mulberries?!?), I picked some (17) spent daylily flowers while walking around the yard and decided to see what I could get from them.
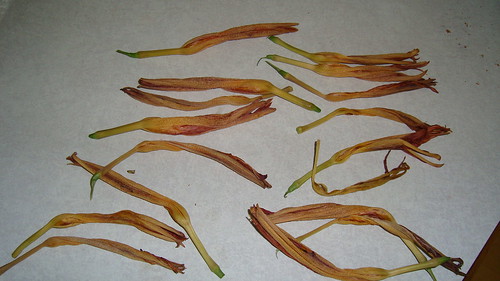
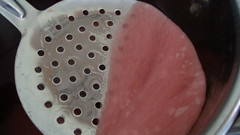
After soaking and them simmering them for 30 minutes, the dyebath color didn't look promising, but I figured I'd drop in a bit of wool and dye it anyway, to see what happened.
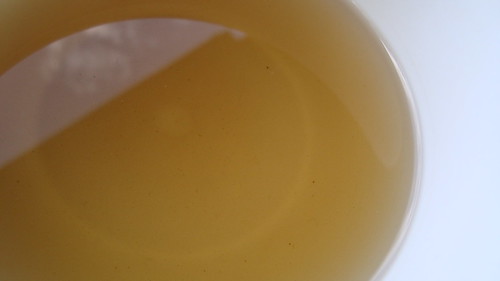
The dyebath pH was as close to neutral as my red cabbage strips can measure:
I added 5 grams of merino wool (pre-mordanted with alum/cream of tartar) and simmered for an hour. When I went back to check on it, there was a faint trace of a yellow-brown color, but it was hard to tell whether it was even on the wool. I didn't even bother to take a picture.
My weekend ended, and I headed back to work the next morning. Didn't get around to taking the wool out. Another day passed, and late in the evening I finally remembered to take that ugly wool out of the dyepot so I could start another plant... and wow, something changed!!
I thought it would be a trick, like with my berry dyes, and all the color would wash right out, but the rinse water stayed completely clear - as far as I can tell, none of the color rinsed out at all, even with dishsoap!

Finally, a color I'd be happy to reproduce. Next time I'll have to weigh the daylily flowers; I completely forgot to do that. And maybe I'll even try mulberries again before the season is over. They dye everyone's feet dark purple, how can I fail? But first I think I'll try walnut leaves, that should be even harder to mess up...
Friday, May 15, 2009
Second dye attempt - buckthorn berries
I know that buckthorn berries from another species of buckthorn were used to make a yellow wool dye in past centuries, so I decided to see what I could do with the buckthorn berries from our local park, after they'd fermented on the trees all winter.
I collected them while everything was still frozen and stored them in the freezer until I was ready to use them (a few weeks).
Following the general tips in Rita Buchanan's book, I put the berries into a gallon ziploc bag and smashed it gently with a rubber mallet to break up the skins. Then I put the berries in an empty cottage cheese container with just enough water/vinegar mixture to cover them (4 parts water to 1 part vinegar). I left the container on the kitchen counter for a week - I was worried there would be a strong fermented smell, but it never got bad, certainly not as strong as when we're fermenting to make beer or wine!
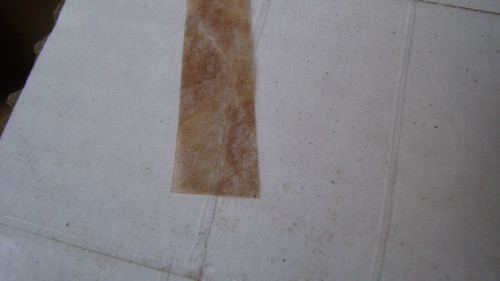
After one week, I tested the pH using my red cabbage strips; it was definitely in the acidic range, but I can't easily get more specific than that:
Then, it was time to dye! I heated the dyebath to a simmer and added my wool. I let it simmer for about an hour, then left the dyepot to cool for the day. The dyebath wasn't a color that would make my list of favorites, but at least it showed some promise:

Unfortunately, when I pulled the wool out and rinsed it, all I got was a very pale, muddy yellow brown. I'll try overdying it with dandelions or garlic mustard something and see what I can do with it... guess buckthorn berries (Rhamnus cathartica species) aren't going on my list of favorite local dyestuffs! Would have been nice to use that invasive pest for something...
I collected them while everything was still frozen and stored them in the freezer until I was ready to use them (a few weeks).
Following the general tips in Rita Buchanan's book, I put the berries into a gallon ziploc bag and smashed it gently with a rubber mallet to break up the skins. Then I put the berries in an empty cottage cheese container with just enough water/vinegar mixture to cover them (4 parts water to 1 part vinegar). I left the container on the kitchen counter for a week - I was worried there would be a strong fermented smell, but it never got bad, certainly not as strong as when we're fermenting to make beer or wine!
After one week, I tested the pH using my red cabbage strips; it was definitely in the acidic range, but I can't easily get more specific than that:
Then, it was time to dye! I heated the dyebath to a simmer and added my wool. I let it simmer for about an hour, then left the dyepot to cool for the day. The dyebath wasn't a color that would make my list of favorites, but at least it showed some promise:
Unfortunately, when I pulled the wool out and rinsed it, all I got was a very pale, muddy yellow brown. I'll try overdying it with dandelions or garlic mustard something and see what I can do with it... guess buckthorn berries (Rhamnus cathartica species) aren't going on my list of favorite local dyestuffs! Would have been nice to use that invasive pest for something...
Sunday, April 12, 2009
First dye attempt - yellow onion on wool roving
Well, it's still drying but I feel much less nervous about dyeing now that I've tried it once! I've been putting off the buckthorn-berry trial until I could either a) use the campstove out on our back patio or b) at least open the windows on the house. It's finally warm enough this weekend to do that, but then I chickened out and decided to go with the definitely-non-toxic onion skins first (especially since I had a dyebath all made up from dying Easter eggs!)
Not much exciting to tell; I soaked the wool overnight in alum (for mordant) and cream of tartar (for color uptake), and then added it to the room-temperature onion-skin dye this morning. Slowly raised the temperature to near boiling (took about 45 minutes), then turned off the stove and let it soak for another couple of hours.
The dyebath was neutral, as far as I can tell from my red-cabbage pH paper. I dyed 27 g (~0.9 oz) of wool that had been pre-mordanted in 3g alum, 1g cream of tartar. I didn't weigh the onion skins before making the dyebath, but after I strained them out at the end they weighed 39g. The dyebath was still VERY dark after dying the wool and I think I could have dyed quite a bit more, but I didn't have any ready (and wasn't sure how much of this color I actually want!)
Funny, I'm so excited about this I almost really like the color, although if you'd ask me before today I'd say it's one of the ugliest colors known to man. I still think it's pretty ugly, this will either become yarn that is only accents on a hat or something, or maybe it can be spun in small amounts with other yarn just to provide a touch of color without making anyone look at the strong full-color version of it...!
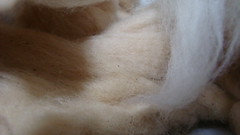
Here's the roving (set in the sun only long enough for photos!) You can see that it felted some compared with the undyed bit, even though I tried very hard not to agitate it or change temperature quickly. I'm hoping that will quickly card out.

The wool is now drying out on the front deck, in the shade. Next weekend, I hope to finally try to buckthorn berries! Unfortunately, I was looking through my dyebooks again and finally did the math - Rita Buchanan's book mentioned as a general rule of thumb, that for rich colors 2 gallons of berries should be used for 1 pound of wool. I'd like to do an ounce of wool (1/16 pound), so that would need 2 cups of berries... not sure I've stashed that many away in the fridge. Maybe it's time for another walk down to the park to see if there are any berries left (with a scissors, this time, pulling those all off by hand was NOT fun, it was like grabbing gooey cold roofing tar).
Not much exciting to tell; I soaked the wool overnight in alum (for mordant) and cream of tartar (for color uptake), and then added it to the room-temperature onion-skin dye this morning. Slowly raised the temperature to near boiling (took about 45 minutes), then turned off the stove and let it soak for another couple of hours.
The dyebath was neutral, as far as I can tell from my red-cabbage pH paper. I dyed 27 g (~0.9 oz) of wool that had been pre-mordanted in 3g alum, 1g cream of tartar. I didn't weigh the onion skins before making the dyebath, but after I strained them out at the end they weighed 39g. The dyebath was still VERY dark after dying the wool and I think I could have dyed quite a bit more, but I didn't have any ready (and wasn't sure how much of this color I actually want!)
Funny, I'm so excited about this I almost really like the color, although if you'd ask me before today I'd say it's one of the ugliest colors known to man. I still think it's pretty ugly, this will either become yarn that is only accents on a hat or something, or maybe it can be spun in small amounts with other yarn just to provide a touch of color without making anyone look at the strong full-color version of it...!
Here's the roving (set in the sun only long enough for photos!) You can see that it felted some compared with the undyed bit, even though I tried very hard not to agitate it or change temperature quickly. I'm hoping that will quickly card out.
The wool is now drying out on the front deck, in the shade. Next weekend, I hope to finally try to buckthorn berries! Unfortunately, I was looking through my dyebooks again and finally did the math - Rita Buchanan's book mentioned as a general rule of thumb, that for rich colors 2 gallons of berries should be used for 1 pound of wool. I'd like to do an ounce of wool (1/16 pound), so that would need 2 cups of berries... not sure I've stashed that many away in the fridge. Maybe it's time for another walk down to the park to see if there are any berries left (with a scissors, this time, pulling those all off by hand was NOT fun, it was like grabbing gooey cold roofing tar).
Saturday, April 11, 2009
Easter with natural dyes
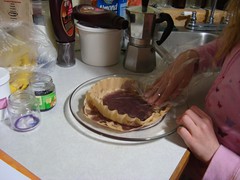
This Easter, I bought some artificial dyes for my daughter to make her brightly colored eggs, but I also saved off 8 eggs to play with natural dyes. Last year, we went to the area nature center and dyed eggs in many different home ingredients (coffee, red cabbage, onion skins, etc.) - I was surprised at how much color we were able to get.
This year, I did it at home. Instead of boiling the eggs beforehand, I boiled each batch along with their color - 1 minute of boiling, 20 minutes simmering (at least, that was the idea).
I tried 4 different ingredients (I thought of using avocado skins as a 5th kind, but by the time I finished the 4th batch I was ready to clean up the kitchen and be done with dying eggs for the year).
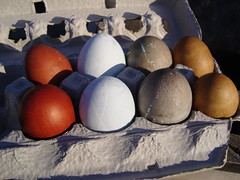
I really liked how the eggs turned out (even though my daughter and husband swear the red cabbage eggs look white, not periwinkle blue!)
From left to right: yellow onion skin, red cabbage, tea overlaid with red cabbage, and instant coffee
I liked the yellow onion skin dye so much, I strained out the dyebath and I'm going to dye an ounce of wool with it tomorrow morning (the wool is soaking in its alum bath right now). I hope it works out well! Haven't checked the dyebath pH yet, I plan to do that before I put the wool in. I really was surprised at how orangey the yellow onion bath turned out, I thought the quercitron was a purer yellow. I looked in my dyebooks again and I guess it says it's a "clear" color, not that it's a lemon yellow color. One book does describe it as an orange-yellow, so I guess I read too fast. I still had never imagined the beautiful copper-penny yellow it turned the eggs. I wonder if the calcium in the eggshells raised the dyebath pH? Guess I'll find out soon.
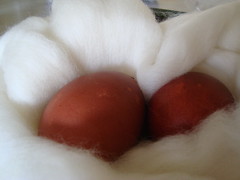
The yellow onion skin batch was also the final batch that I did; and although I thought 1) that I'd turned down the heat once it was boiling and 2) I'd turned off the heat at the 20-minute mark... it turns out neither was true. So I actually boiled the eggs and onion-skin dyebath for at least 40 minutes. Not sure the eggs will be edible... but they're certainly a nice bold color!!
This year, I did it at home. Instead of boiling the eggs beforehand, I boiled each batch along with their color - 1 minute of boiling, 20 minutes simmering (at least, that was the idea).
I tried 4 different ingredients (I thought of using avocado skins as a 5th kind, but by the time I finished the 4th batch I was ready to clean up the kitchen and be done with dying eggs for the year).
I really liked how the eggs turned out (even though my daughter and husband swear the red cabbage eggs look white, not periwinkle blue!)
From left to right: yellow onion skin, red cabbage, tea overlaid with red cabbage, and instant coffee
I liked the yellow onion skin dye so much, I strained out the dyebath and I'm going to dye an ounce of wool with it tomorrow morning (the wool is soaking in its alum bath right now). I hope it works out well! Haven't checked the dyebath pH yet, I plan to do that before I put the wool in. I really was surprised at how orangey the yellow onion bath turned out, I thought the quercitron was a purer yellow. I looked in my dyebooks again and I guess it says it's a "clear" color, not that it's a lemon yellow color. One book does describe it as an orange-yellow, so I guess I read too fast. I still had never imagined the beautiful copper-penny yellow it turned the eggs. I wonder if the calcium in the eggshells raised the dyebath pH? Guess I'll find out soon.
The yellow onion skin batch was also the final batch that I did; and although I thought 1) that I'd turned down the heat once it was boiling and 2) I'd turned off the heat at the 20-minute mark... it turns out neither was true. So I actually boiled the eggs and onion-skin dyebath for at least 40 minutes. Not sure the eggs will be edible... but they're certainly a nice bold color!!
Saturday, March 21, 2009
pH paper details
For those who are curious about making this stuff, I thought I'd post what I did along with pictures.
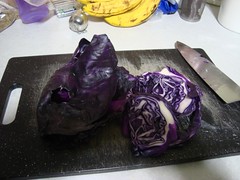
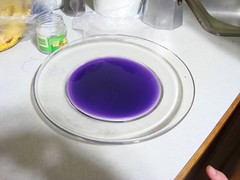
I started with a red cabbage from the store. I didn't think I needed the juice from a whole cabbage, so I just cut off a slice, and added the deepest-colored outer leaf.
The instructions I was following said to blend the cabbage, but I chopped it; I didn't want to clean out the blender afterward!
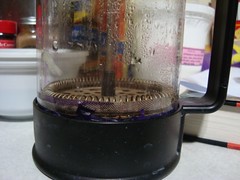
The instructions also said to microwave the cabbage, but I tried cooking it in a small covered pot on the stovetop first. I put the pot on low heat for 5 minutes with 1/4 cup tapwater added. Then, I put the cooked cabbage in a glass coffee press and strained out as much juice as I could:
I didn't think it looked like very much juice, and I wanted to see if cooking it on the stove made any noticeable difference from microwaving it, so I took the cabbage out of the coffee press, put it in a microwavable bowl, added 1/4 cup more tapwater and microwaved it for about 4 minutes (low-power; we have a 20-year-old microwave that only HAS one power setting). Except for getting a lot more water left at the end (must have evaporated a lot in the pot), I couldn't see any difference.
I poured the liquid into a large glass bowl and soaked my coffee-filter paper that way. (I only had natural brown, not the bleached white that would probably show colors more clearly.) My daughter and I used clothespins to hang up the filter paper around the basement to dry (it was sleeting outside).
The next morning, we took one stovetop and one microwave-prepared sample down and tested the color-change with various substances (suggested on the about.com page I found my instructions on). I did think it was interesting that the filter paper didn't show a color change with our tap water, but when I rinsed out the extra liquid it turned bright blue in the sink instead of purple. I didn't see any color change with milk, either, even though it should have caused one according to the about.com page.
A bit rough, but I think this will work just fine for figuring out if my dyebaths are acidic, neutral, or alkaline. At this stage I'm not going to worry about -exactly- what the pH value is. I do plan to take pictures but I'm sure it will be hard to get the lighting the same in each pictures (even in the two I have here the colors don't look quite the same; I think one had flash and one didn't).
I started with a red cabbage from the store. I didn't think I needed the juice from a whole cabbage, so I just cut off a slice, and added the deepest-colored outer leaf.
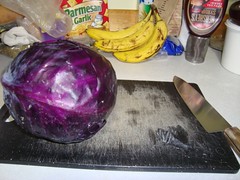 |  | 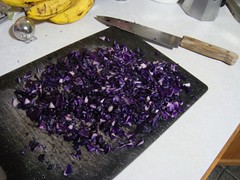 |
The instructions I was following said to blend the cabbage, but I chopped it; I didn't want to clean out the blender afterward!
The instructions also said to microwave the cabbage, but I tried cooking it in a small covered pot on the stovetop first. I put the pot on low heat for 5 minutes with 1/4 cup tapwater added. Then, I put the cooked cabbage in a glass coffee press and strained out as much juice as I could:
 | 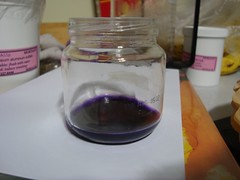 |
I didn't think it looked like very much juice, and I wanted to see if cooking it on the stove made any noticeable difference from microwaving it, so I took the cabbage out of the coffee press, put it in a microwavable bowl, added 1/4 cup more tapwater and microwaved it for about 4 minutes (low-power; we have a 20-year-old microwave that only HAS one power setting). Except for getting a lot more water left at the end (must have evaporated a lot in the pot), I couldn't see any difference.
I poured the liquid into a large glass bowl and soaked my coffee-filter paper that way. (I only had natural brown, not the bleached white that would probably show colors more clearly.) My daughter and I used clothespins to hang up the filter paper around the basement to dry (it was sleeting outside).
 |  |  |
The next morning, we took one stovetop and one microwave-prepared sample down and tested the color-change with various substances (suggested on the about.com page I found my instructions on). I did think it was interesting that the filter paper didn't show a color change with our tap water, but when I rinsed out the extra liquid it turned bright blue in the sink instead of purple. I didn't see any color change with milk, either, even though it should have caused one according to the about.com page.
Stovetop paper 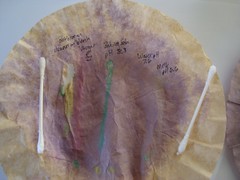 | Microwaved paper (also soaked more thoroughly)  |
A bit rough, but I think this will work just fine for figuring out if my dyebaths are acidic, neutral, or alkaline. At this stage I'm not going to worry about -exactly- what the pH value is. I do plan to take pictures but I'm sure it will be hard to get the lighting the same in each pictures (even in the two I have here the colors don't look quite the same; I think one had flash and one didn't).
Red Cabbage pH paper
Getting ready to finally try my first dyebath, using the buckthorn berries I salvaged at the end of winter (they've been in the freezer for the past week; I figured if they went through the winter outside on the trees, the freezer wouldn't change the structure any!)
I wanted to be able to tell whether the dyebath was acidic or alkaline, but didn't have any manufactured test strips handy. Fortunately, I came across the about.com writeup on making test strips from red cabbage, so my daughter and I did that last night.
We tested various known pH substances this morning and got beautiful hot pink for acidic, purple for neutral, blue-green for somewhat alkaline and yellow for very alkaline. (I took lots of pictures, if I ever get a chance I'll put them up with more details.) Our filter paper was natural brown-colored, not bleached white, so our colors probably look a bit different than people who use white paper.
If I can get the courage up to start, today I'll simmer the berries, soak the wool in an alum mordant, and in the late afternoon be ready to find out what color I get!!
Saturday, March 14, 2009
Buckthorn quest
Since we're not able to work on the sailboat right now (epoxy and toddlers don't mix!), and our basement renovation is stalled until it warms up enough outside to use the house (our next step in the basement is pouring some cement and we want to be able to easily clean the wheelbarrow and tools), my free-time project now is learning to dye wool using plants from our yard.
My husband decided a couple of years ago that for family Christmas presents, he wanted us to give each other only presents made by hand. I picked about the only handcrafting skill I have, knitting, and knitted socks this past Christmas. For next Christmas, I’d like to dye some wool yarn with plant dyes made from materials in our yard and knit something special out of those for each person.
As it's mid-March here and the ground is frozen and still covered with snow, most of the dyeplants I could use are unavailable. The more I learn about using natural dyes, the more I'm realizing how much learning/practice may be needed to come up with decent colors. So, rather than wait until June or July, I was able to come up with a couple of things I can collect now: the red buds from our silver maple, and inner bark from buckthorn. Before stripping the maple, I decided to focus on buckthorn since it's a nasty invasive that we're trying to eliminate from the yard anyway!
That seemed simple enough, and looking at the couple of dyebooks I have easy access to, I thought I'd just boil the wood chips and dunk alum-mordanted wool in it to see what I get.
Since I didn't have any wool, or alum, I've spend the past couple of weeks obsessively reading more about buckthorn and the chemistry of the pigments in it. At least, trying to read more... most of the really useful information seems to be in published journal articles that I don't have access to. Or in very expensive books that I also don't have access to (the local library system doesn't have any of the ones I've looked for).
But I've been slowly piecing together a lot of bits of information and I think I'm starting to get a picture.
Unfortunately, Xander's screaming because he wants to go outside and play (it's almost 50 degrees today!) so I guess I'm done for now...
Friday, March 13, 2009
All right, I'm going to try this. I want a place to document things for myself, as well as share them with other people who might be interested. The website never gets updated, so maybe a blog will work, at least it's easier to just go post an entry!
The name of the blog is because my husband and I are building a sailboat. Actually, we're not even actively building it right now - our youngest, at 18 months old, pretty effectively prevents that! We have no final name for it yet, but for the last few years we've been sticking with Sorontur, the name of the King of the Eagles in Tolkien's world.
It's a male name, and boats are traditionally female, but it fits in so many ways. First, of course, Dave and I both have loved Tolkien's works since we were young. Second, we currently have a 19' sailboat that is a smaller version of the one we're building, and its name is Blackbird. Moving up from 19' Blackbird to the 33' King of the Eagles makes a lot of sense! ;) And finally, to us this boat is the pinnacle of where we want to be, it's our freedom and a home and allows us to travel most places of the world, more quickly and more comfortably (according to our desires) than most other liveaboard, ocean-cruising sailboats. As a king could be considered the ultimate position, to us this boat is the ultimate sailboat. :)
Dinner's calling... we'll see if I ever get back here to post again!
Subscribe to:
Posts (Atom)