Saturday, March 21, 2009

pH paper details

For those who are curious about making this stuff, I thought I'd post what I did along with pictures.

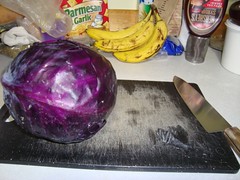
I started with a red cabbage from the store. I didn't think I needed the juice from a whole cabbage, so I just cut off a slice, and added the deepest-colored outer leaf.


dsc00143.jpg

dsc00145.jpg

dsc00146.jpg

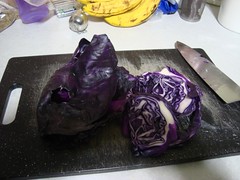
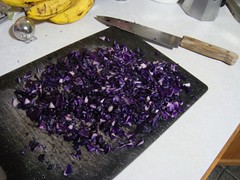
The instructions I was following said to blend the cabbage, but I chopped it; I didn't want to clean out the blender afterward!

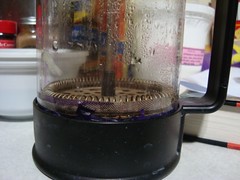
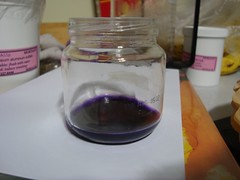
The instructions also said to microwave the cabbage, but I tried cooking it in a small covered pot on the stovetop first. I put the pot on low heat for 5 minutes with 1/4 cup tapwater added. Then, I put the cooked cabbage in a glass coffee press and strained out as much juice as I could:


dsc00150.jpg

dsc00149.jpg

I didn't think it looked like very much juice, and I wanted to see if cooking it on the stove made any noticeable difference from microwaving it, so I took the cabbage out of the coffee press, put it in a microwavable bowl, added 1/4 cup more tapwater and microwaved it for about 4 minutes (low-power; we have a 20-year-old microwave that only HAS one power setting). Except for getting a lot more water left at the end (must have evaporated a lot in the pot), I couldn't see any difference.

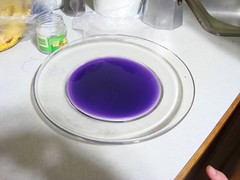
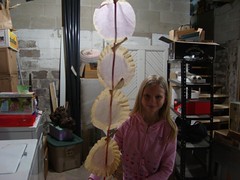
I poured the liquid into a large glass bowl and soaked my coffee-filter paper that way. (I only had natural brown, not the bleached white that would probably show colors more clearly.) My daughter and I used clothespins to hang up the filter paper around the basement to dry (it was sleeting outside).


dsc00159.jpg

dsc00151.jpg

dsc00156.jpg

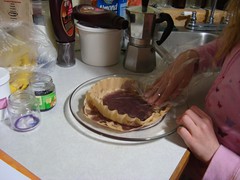
The next morning, we took one stovetop and one microwave-prepared sample down and tested the color-change with various substances (suggested on the about.com page I found my instructions on). I did think it was interesting that the filter paper didn't show a color change with our tap water, but when I rinsed out the extra liquid it turned bright blue in the sink instead of purple. I didn't see any color change with milk, either, even though it should have caused one according to the about.com page.


Stovetop paperdsc00173.jpg

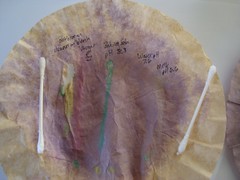
Microwaved paper
(also soaked more thoroughly)dsc00174.jpg


A bit rough, but I think this will work just fine for figuring out if my dyebaths are acidic, neutral, or alkaline. At this stage I'm not going to worry about -exactly- what the pH value is. I do plan to take pictures but I'm sure it will be hard to get the lighting the same in each pictures (even in the two I have here the colors don't look quite the same; I think one had flash and one didn't).

Red Cabbage pH paper

Getting ready to finally try my first dyebath, using the buckthorn berries I salvaged at the end of winter (they've been in the freezer for the past week; I figured if they went through the winter outside on the trees, the freezer wouldn't change the structure any!)

I wanted to be able to tell whether the dyebath was acidic or alkaline, but didn't have any manufactured test strips handy. Fortunately, I came across the about.com writeup on making test strips from red cabbage, so my daughter and I did that last night.

We tested various known pH substances this morning and got beautiful hot pink for acidic, purple for neutral, blue-green for somewhat alkaline and yellow for very alkaline. (I took lots of pictures, if I ever get a chance I'll put them up with more details.) Our filter paper was natural brown-colored, not bleached white, so our colors probably look a bit different than people who use white paper.

If I can get the courage up to start, today I'll simmer the berries, soak the wool in an alum mordant, and in the late afternoon be ready to find out what color I get!!

Saturday, March 14, 2009

Buckthorn quest

Since we're not able to work on the sailboat right now (epoxy and toddlers don't mix!), and our basement renovation is stalled until it warms up enough outside to use the house (our next step in the basement is pouring some cement and we want to be able to easily clean the wheelbarrow and tools), my free-time project now is learning to dye wool using plants from our yard.

My husband decided a couple of years ago that for family Christmas presents, he wanted us to give each other only presents made by hand. I picked about the only handcrafting skill I have, knitting, and knitted socks this past Christmas. For next Christmas, I’d like to dye some wool yarn with plant dyes made from materials in our yard and knit something special out of those for each person.

As it's mid-March here and the ground is frozen and still covered with snow, most of the dyeplants I could use are unavailable. The more I learn about using natural dyes, the more I'm realizing how much learning/practice may be needed to come up with decent colors. So, rather than wait until June or July, I was able to come up with a couple of things I can collect now: the red buds from our silver maple, and inner bark from buckthorn. Before stripping the maple, I decided to focus on buckthorn since it's a nasty invasive that we're trying to eliminate from the yard anyway!

That seemed simple enough, and looking at the couple of dyebooks I have easy access to, I thought I'd just boil the wood chips and dunk alum-mordanted wool in it to see what I get.

Since I didn't have any wool, or alum, I've spend the past couple of weeks obsessively reading more about buckthorn and the chemistry of the pigments in it. At least, trying to read more... most of the really useful information seems to be in published journal articles that I don't have access to. Or in very expensive books that I also don't have access to (the local library system doesn't have any of the ones I've looked for).

But I've been slowly piecing together a lot of bits of information and I think I'm starting to get a picture.

Unfortunately, Xander's screaming because he wants to go outside and play (it's almost 50 degrees today!) so I guess I'm done for now...

Friday, March 13, 2009

All right, I'm going to try this. I want a place to document things for myself, as well as share them with other people who might be interested. The website never gets updated, so maybe a blog will work, at least it's easier to just go post an entry!

The name of the blog is because my husband and I are building a sailboat. Actually, we're not even actively building it right now - our youngest, at 18 months old, pretty effectively prevents that! We have no final name for it yet, but for the last few years we've been sticking with Sorontur, the name of the King of the Eagles in Tolkien's world.

It's a male name, and boats are traditionally female, but it fits in so many ways. First, of course, Dave and I both have loved Tolkien's works since we were young. Second, we currently have a 19' sailboat that is a smaller version of the one we're building, and its name is Blackbird. Moving up from 19' Blackbird to the 33' King of the Eagles makes a lot of sense! ;) And finally, to us this boat is the pinnacle of where we want to be, it's our freedom and a home and allows us to travel most places of the world, more quickly and more comfortably (according to our desires) than most other liveaboard, ocean-cruising sailboats. As a king could be considered the ultimate position, to us this boat is the ultimate sailboat. :)

Dinner's calling... we'll see if I ever get back here to post again!